


You do not need to fill out everything all at once, you are free to come back and edit Tasks as you see fit. We recommend to keep it simple at first and just give each Task a nice description and Job #. It's also important to understand the relationship between Task ID and Task #'s.
A schedule is nothing more than a number of tasks associated with a particular job. You can create a new Job by going to the Job Manager and clicking Create a Job. You can also add jobs on the fly from within a Task if it does not already exist. Simply type the new job name into the Job Description field of a Task and VirtualBoss will ask you to create it if it doesn't exist.
First you go to the Job Manager and click "add job". You'll be asked to give the Job a name. Naming a job is important and you should choose the name that best describes your new schedule. You can think about jobs as if each one were a different schedule. Once you've given the job a name then you'll be shown a detail window that you can use to provide additional information about this job.
For just starting out, simply giving the Job a name is enough to begin making your schedule.
To duplicate a job, go into the Job Manager and select the job you wish to duplicate. Then, while it is highlighted, click the "Duplicate this job and all it's tasks" option. You can also find this option by right-clicking on the job you wish to duplicate.
The Task # field is a bit different and provides some functionality to each Task. Unlike the Task ID, the Task # can be changed. The Task # (previously called "order #") is a number given to a Task by the user. It's purpose is to show where this particular task falls in a schedule. (as of build 280, virtualboss has an option to automatically assign task #'s for a job)
We highly recommend to use this Task # field to give your schedules a sense of flow from the first task to the last. You'll also gain additional options by using the Task # fields such as the ability to sort a schedule (in ascending or descending order) based in these Task #'s.
QuickBooks Synchronization / Troubleshooting
- QuickBooks needs to be open on your Computer and logged in as the Administrator. This is important. Only the Admin login to QuickBooks can allow applications to set up a certificate for syncing.
- VirtualBoss needs to be installed and running on the same computer.
Once you have achieved the above steps, it's time to initiate the sync process. In VirtualBoss, go to File, then QuickBooks Synchronization.
Problems When Attempting To Sync
Can't Open QuickBooks
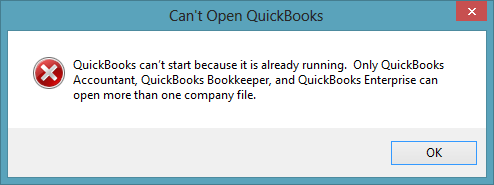
If you encounter this error, please follow these steps.
- Close VirtualBoss and then Right-Click on the program shortcut and go to Properties.
- Under the Compatibility tab, un-check the box next to Run this program as an administrator. Then hit Ok.
Now open VirtualBoss again and go to Options, then QuickBooks Synchronization.
QuickBooks Is Not Running.
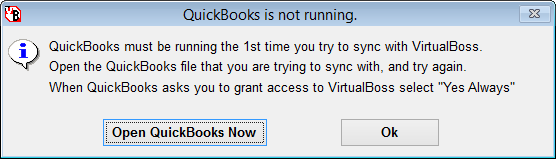
If you see this message, check to make sure that you have QuickBooks already opened. This message may appear if you have QuickBooks opened, but are not logged in as Administrator.
Error (Line 1232): Could not start QuickBooks...
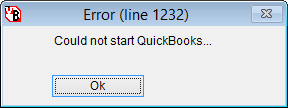
This message is often seen if you have not initially set up VirtualBoss to sync with QuickBooks. Please see the beginning of this section. This message can also appear if you are attempting to sync for the first time and QuickBooks is not running.
Printing Work Orders and Schedules
Please note: VirtualBoss prints or emails every task that appears on the Task List by default
What does this mean? This means that if you have 200 tasks on your Task List and only wish to print out 10, you need to hide the other 190 tasks before you choose to print or else you'll end up printing all of them.This may seem at first to be tricky, but by using the Filter Options you can quickly pull up any information you wish to view in seconds.
Here's a list of benefits you'll get as a support plan customer
- Unlimited upgrades for VirtualBoss - When we release an upgrade it's available to you immediately
- Live remote computer support - Have us log into your computer through the internet and troubleshoot or train!
- Email and Live Webchat Support
Some products let you synchronize your data to mobile devices and take it with you where ever you go. Remote VirtualBoss does something a bit different. It allows you to directly connect to your data through a website that you control. There is no synchronization needed here. All information is updated in real time as it's changed so anyone using the software from an office PC or using the Remote VirtualBoss website from a mobile device will see the same information as it's entered.
You can set up Remote VirtualBoss yourself, or have us handle it for you! (Support Plan required for Remote VirtualBoss set up help)
In order to have multiple users on VirtualBoss, you'll need to install the software on each computer you wish to use. Next, you'll want to identify a single database you wish to share among all users. This database can be created on any machine, so long as it's accessible to other network users.
Once you have your database created and shared, you'll simply open each copy of VirtualBoss and open your database. The idea here is that you have one database being used by multiple people so your information is shared in real time between everyone. When one person makes a change, everyone sees it!
Troubleshooting Apache Install
Most installations of Apache will install just fine with no problems. Just in case you do experience an issue, here are some common problems some users may experience and how you can solve them.
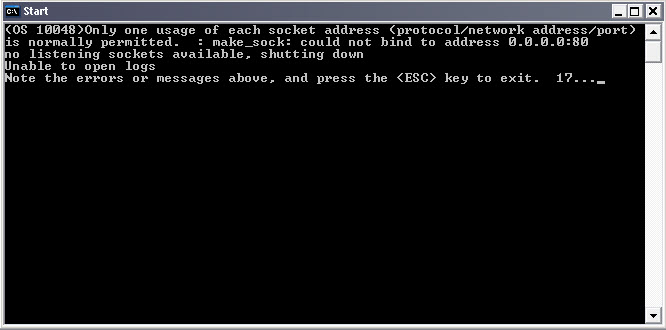
If you see this screen, it means that another program or service is using (Port 80) and Apache can't install its service.
To fix this problem, close the program that may be using port 80. Programs like Skype use Port 80. Try shutting down skype and running the Apache Software again.
If you have IIS already on your computer, this could cause a conflict as well.
Since it's not always obvious which program is causing the port 80 conflict, another way around this problem is to install the Apache service on a port other than Port 80. We typically use port 90 in these cases as 90 is not commonly used by other programs.
First, browse for the Apache config file (httpd.conf) in the Apache installation directory (or under the start menu). It's usually located at "C:\Program Files (x86)\Apache Group\Apache2\conf\httpd.conf". Open this file with a text editor like NotePad or WordPad.
Go under "edit" and "find" and search for Listen 80. This will bring you right to the entry we need to edit. Change the 80 to whichever port you'd like to use. In our example we use 90. So when it's done it will say Listen 90.
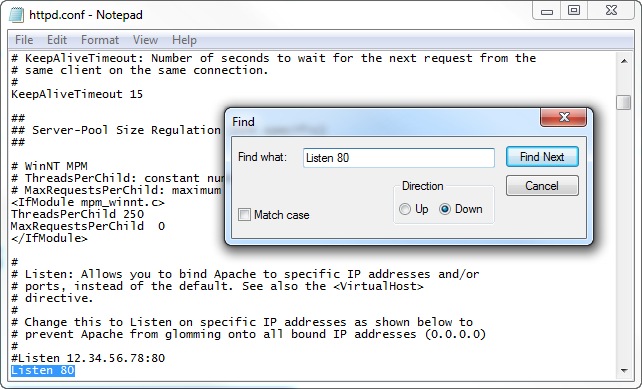
Save and close the Apache config file. Do not use "Save as", just use "save" and then close.
VISTA AND WINDOWS 7 USERS!! - When you go to save the changes you made to the config file, if you see a pop up window asking you to save a new file, hit cancel. Something is preventing you from making changes to the config file. The User Account Control setting is usually the culprit.
To overcome this, you can either turn the User Account Control setting off, or go to the Apache install folder and set the permissions on that folder to allow full control (right click on the folder and go to properties, then security tab). Now you should be able to save the changes you made to the Config file.
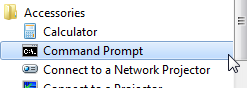
Next, open a command prompt by going under the start menu, accessories, command prompt. Right Click on the command prompt and choose "run as administrator".
type this command into the prompt: cd c:\Program Files\Apache Group\Apache2\bin\ and hit enter. (use "Program Files (x86)" if that's where it installed to)
You should now be located in the "bin" folder of the Apache install directory. Type apache -k install and hit enter.
This will install the Apache Service using Port 90 - or whichever port you chose in the config file earlier. When that's finished type apache -k start and hit enter. This will start the service and you should now have a working apache webserver running. Just remember which port you are using when installing Remote VirtualBoss later, you'll need to enter that into the software when it asks for it.
Importing:
There are actually 2 different types of Imports you can perform with VirtualBoss, Adding information or Updating existing information. It's important to understand the differences and when to use each one. When importing tasks from an excel spreadsheet, you need to ask yourself this question: "Are these new Tasks, or am I updating existing Tasks?"
If the answer is "New Tasks", then you'll want to leave the Task ID field empty. When you do this, VirtualBoss will automatically assign Task ID's to tasks without ID numbers and a new task will be created. This is crucial. If VirtualBoss sees a Task ID on an imported Task, it will attempt to find and update that task within the system (this is the 2nd type of import). This is due to the nature of Task ID's Vs. Task #'s. If no Task ID is found, then a new Task will be created with the Task ID you specified. However, this is not recommended. VirtualBoss creates and distributes Task ID's based on the order Tasks are created and by specifying a Task ID through importing may cause problems in your database.
To keep things simple, Task ID's should only be manually entered on imported Excel sheets if you intend on updating existing Tasks with new information. When in doubt, leave the Task ID field blank and VirtualBoss will take care of it.
Backups can be used to restore your database back to point the backup was made. The backup files are usually small enough you can put them on a flash drive or email them to someone. This is great if you want to Move your data from one computer to another.
You can also perform a manual backup anytime by going to File, and then Backup. The default location for backups are located on C:\Virtualboss\backup, but can be changed to any location you wish by using the preferences.
Restoring Your VirtualBoss Database
IMPORTANT!
Restoring a backup file will ERASE your current opened database and replace it with the information found in the backup file. If you are unsure about restoring from a backup, we highly recommend to create a new database first and restore your data into that to make sure it's what you're expecting.
If you ask anyone here, they'll say you never need more than one database. Thanks to our Filter Options, you can sort through thousands of Tasks and hundreds of Jobs with ease.
Since information in VirtualBoss isn't shared between databases, you may find it hard to keep track of things if you operate with more than one database. Of course, having multiple databases works just fine if that's the way you decide to do things.
Upgrading is very easy! Once you decide you wish to upgrade to a newer release, just visit our download page and follow the instructions. Your software and database will be updated to work with the latest release. It's a good idea to have VirtualBoss closed before running any updates. If you use multiple computers with VirtualBoss, you'll need to update all installations.
Unlocking / Registering VirtualBoss
You'll need to register the software with us online for each new install. This is an easy process and all automated. You can unlock multiple installations without worry.
Can I Use My 1 Workstation License on More Than 1 Computer?
While not required, using a Solid State Hard drive is our number one recommended upgrade to any PC if you're looking to make programs run faster. Of course, to re-iterate, VirtualBoss runs more than fine on any hard drive that exists in your computer. However, if you're looking for pure performance, you'll more than double the speed of any program run from one of these drives.
A minimum of 512MB of RAM is recommended. Most computers these days have 2-4GB of RAM so typically this is not an issue. VirtualBoss will run on 32-bit and 64-bit versions of all Windows OS (xp/vista/7/8)
If you plan on using VirtualBoss on a wifi network, we recommend g or n level speeds. VirtualBoss will work best on a wired connection.
Most internet service providers do not yet offer fast enough speeds to make this a viable option.
A more practical solution is to use Remote VirtualBoss to connect to your data from anywhere!
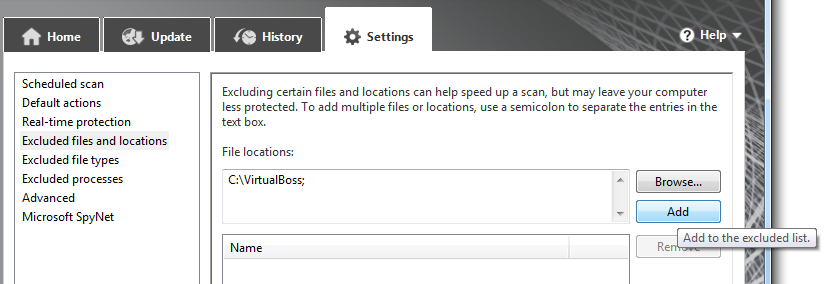
Adding VirtualBoss as an Exception to your Anti-Virus Software
Microsoft Security Essentials:
Malware-Bytes:

AVG Anti-Virus:
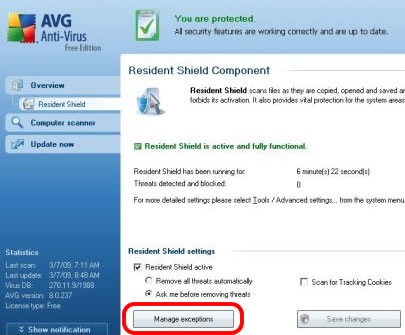
While this isn't a necessary step, by adding VirtualBoss to your Anti-Virus protection Exception list, you should see an increase in speed when using the program.
While we recommend to just use a single database, you are also free to use multiple databases. Just keep in mind that when starting a new database you are essentially starting over from scratch.
Common Error Messages and Solutions
If you connect to a networked database and see the message No VirtualBoss data exists at this location, 9 times out of 10 your mapped network connection did not fully re-connect after a recent restart. To fix this problem, simply refresh your network connection navigating to your mapped networked location in windows explorer. You may even see a red "x" over a mapped drive icon in your My Computer area. Double clicking on the icon will re-connect the location. Once you've done this, VirtualBoss should be able to open the database again.
Please keep in mind that you will need additional licenses for each simultaneous user that accesses the same database.
 VirtualBoss, Inc. ©